Zapier makes connecting workflows and activities between Rock and other applications easier. Zapier supports thousands of applications and helps you automate workflows and centralize information from other applications in your Rock workspaces.
Adding a Zapier bot to your Rock workspaces
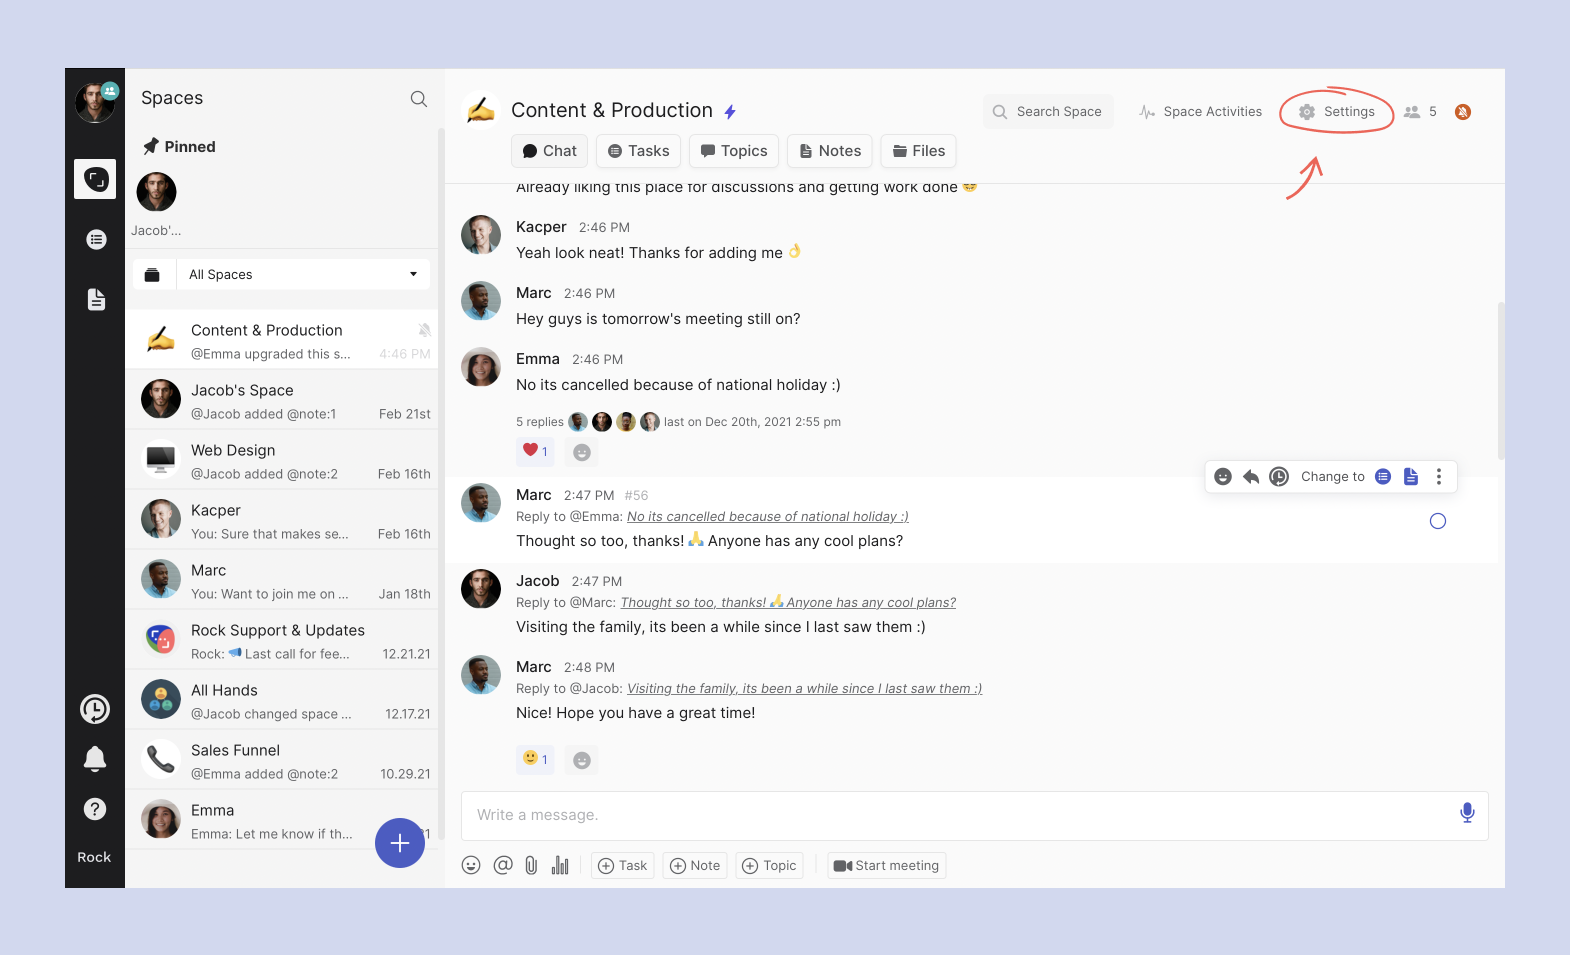
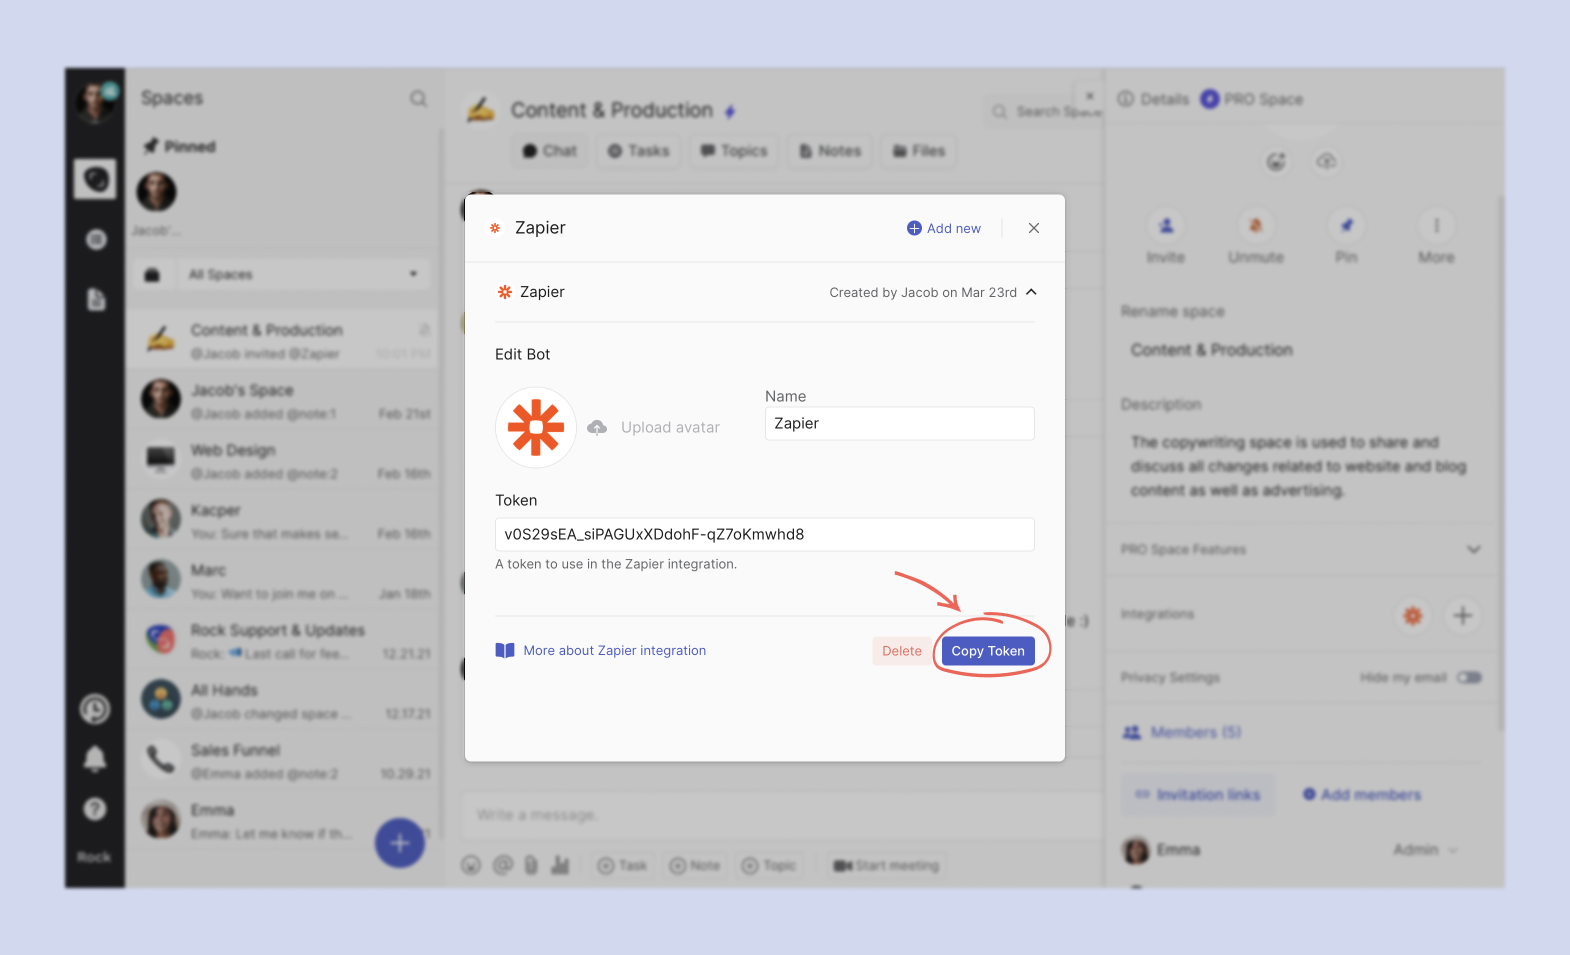
Zapier bots can be added to your PRO spaces in the space details. To add Zapier, your permissions should be at the Admin level. If your permissions are not admin level, the integration panel will not be visible in your space settings.
Here is how to add a Zapier bot to a PRO space:
1. Go to space details
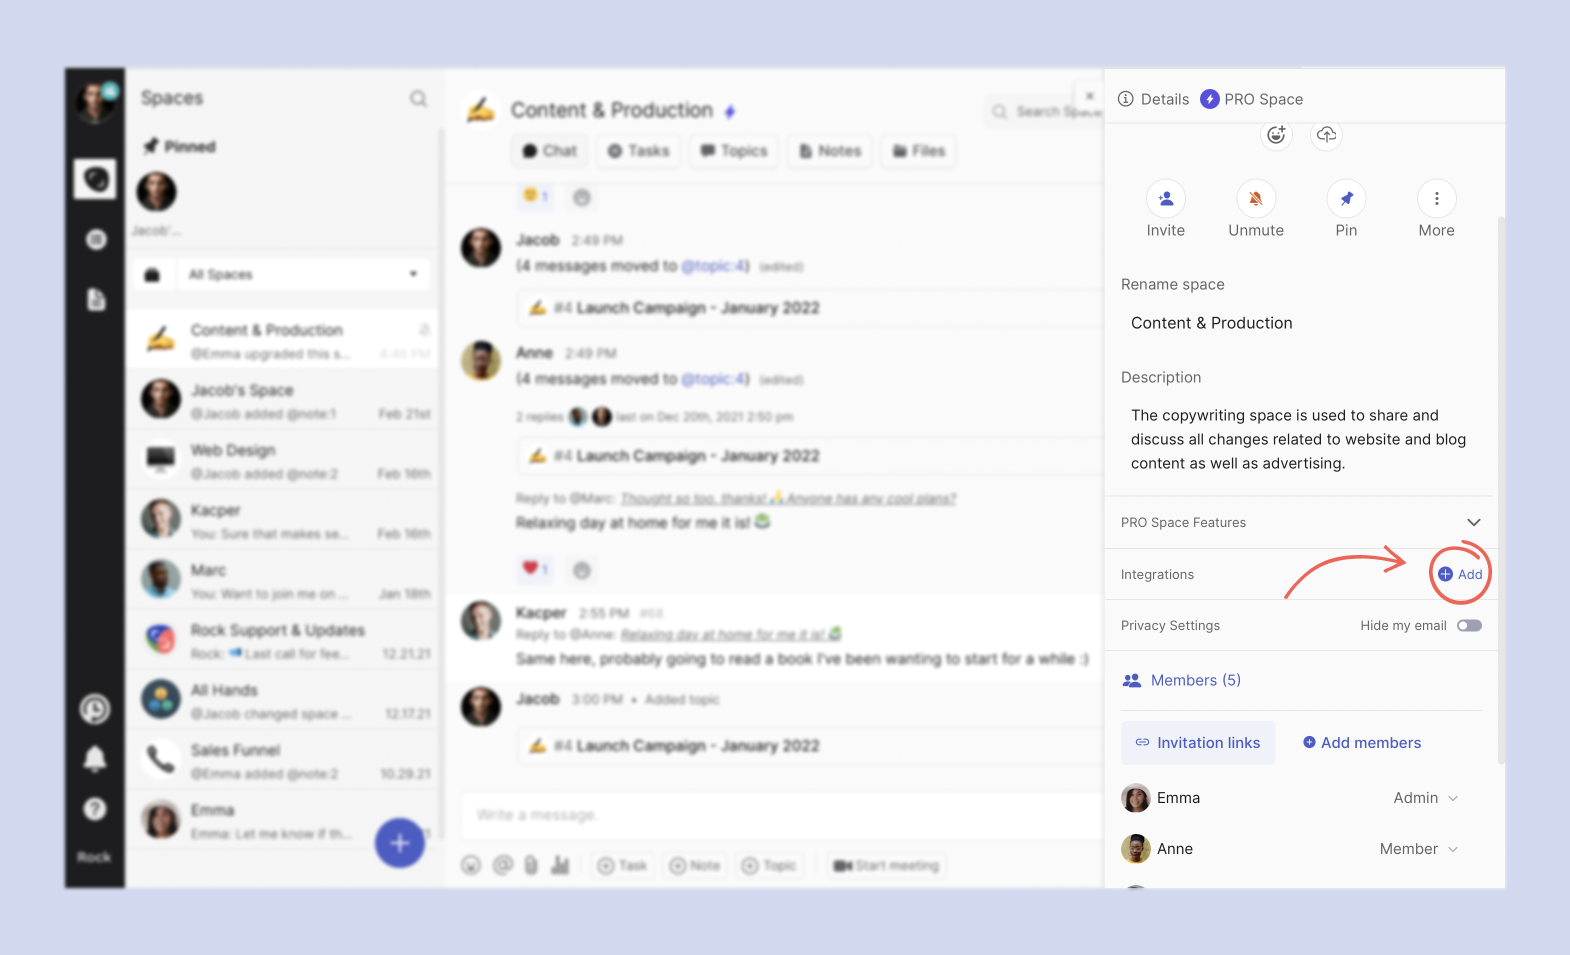
2. Select the add button next to Integrations
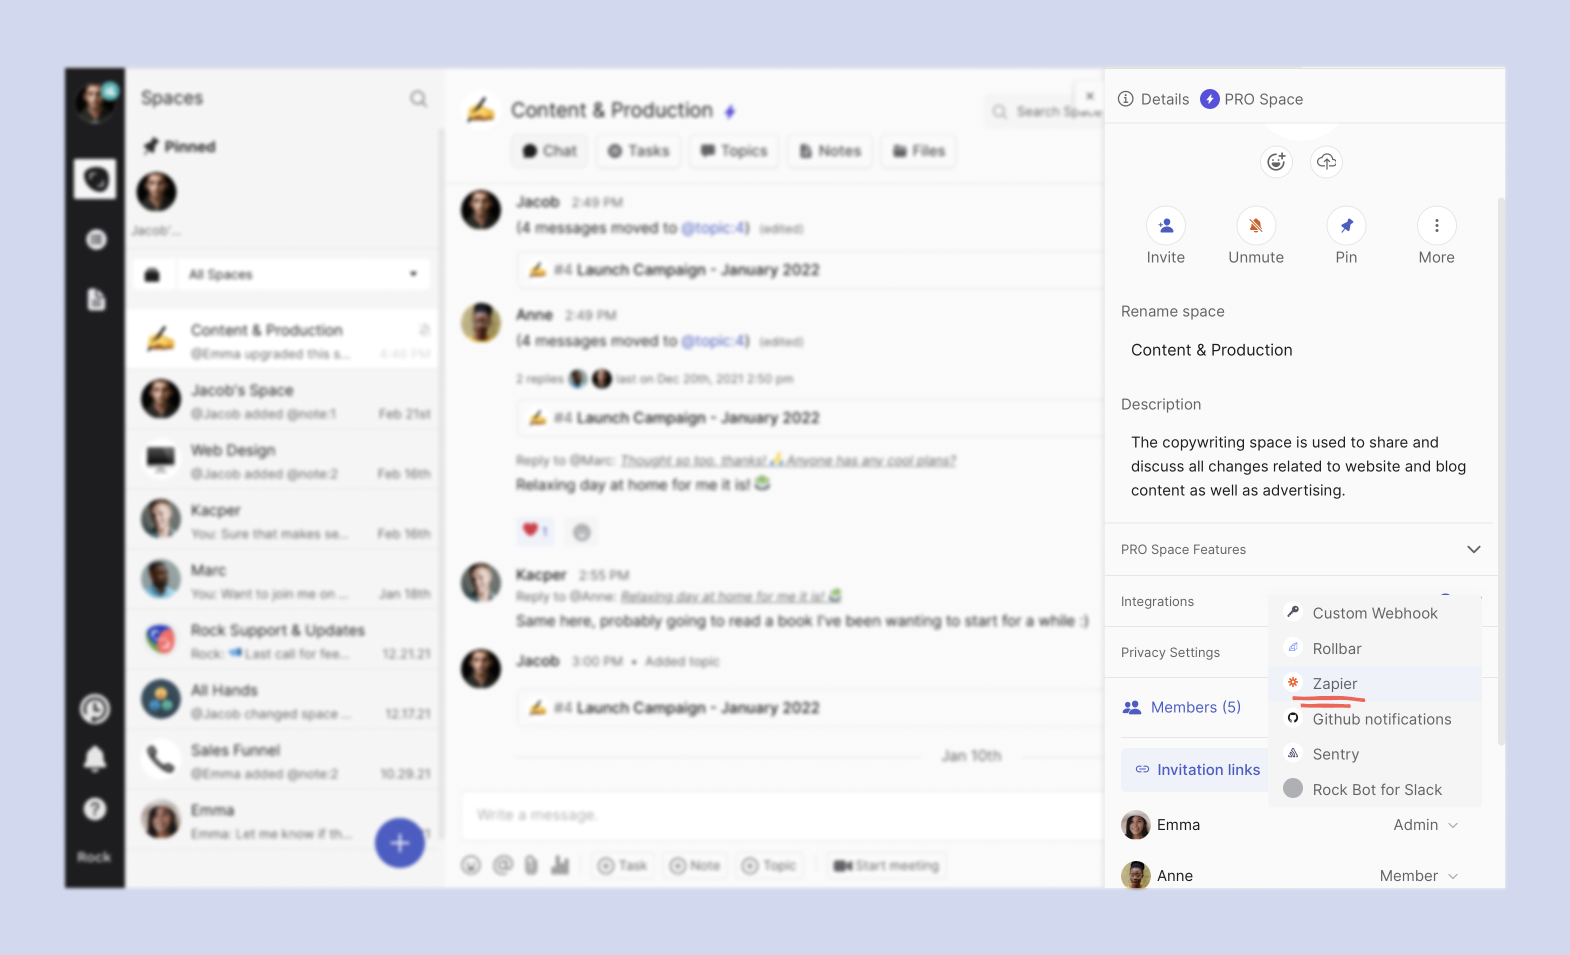
3. Select Zapier from the list
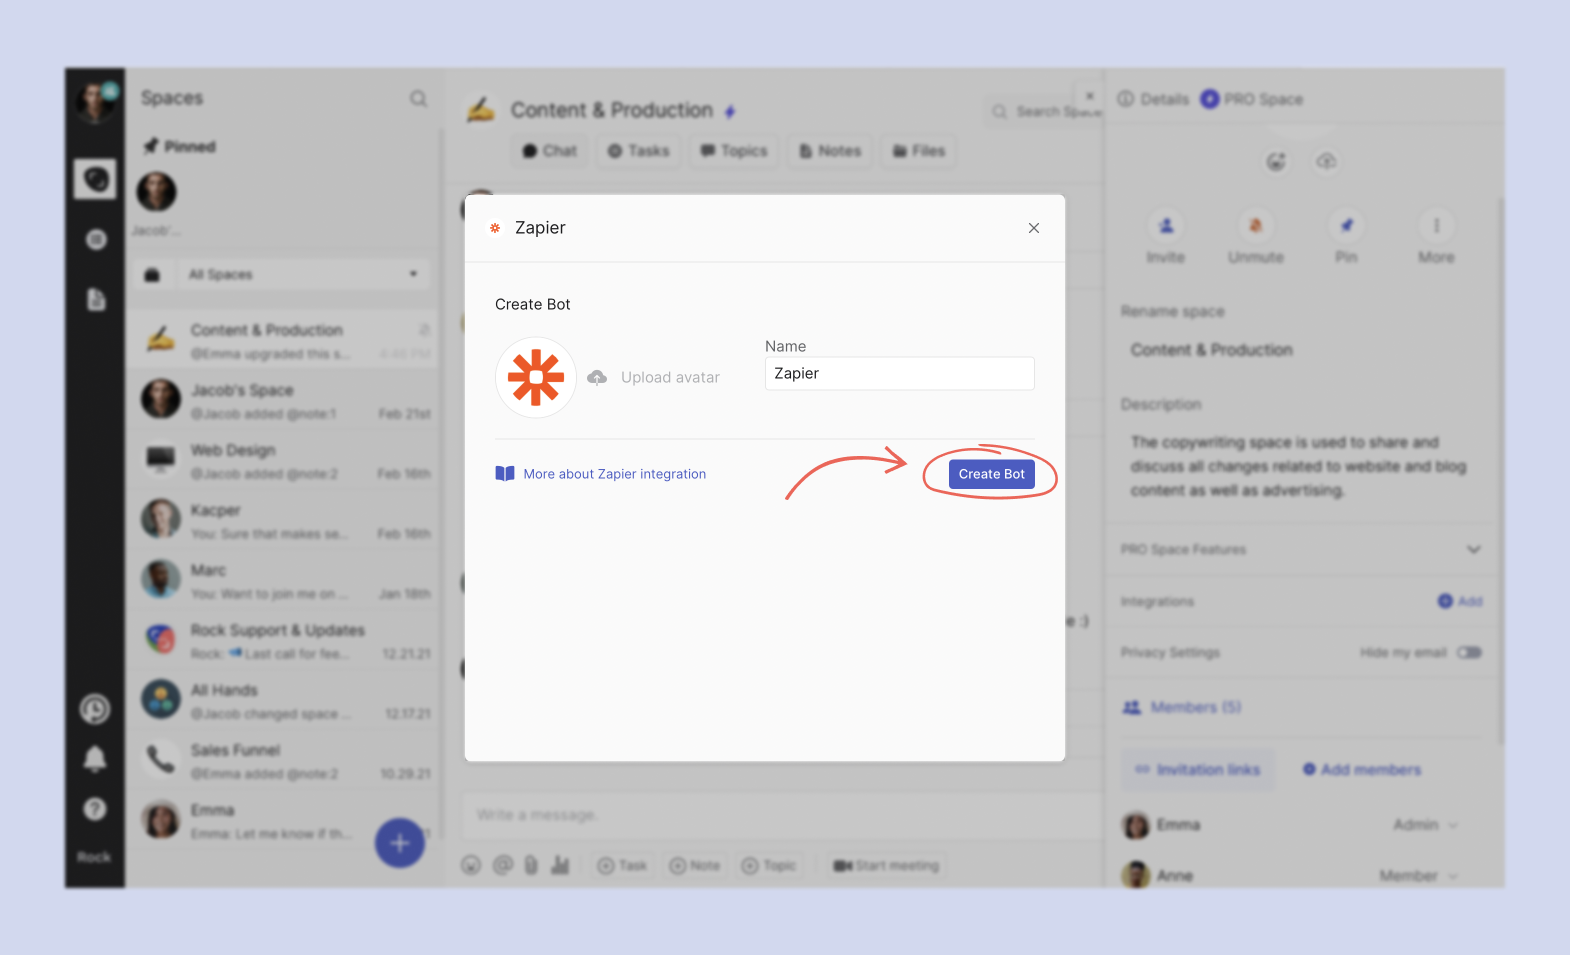
4. You can change your bot’s Name and avatar now or later

5. Click the create bot button
6. Select the copy token button
Connecting Rock to other applications
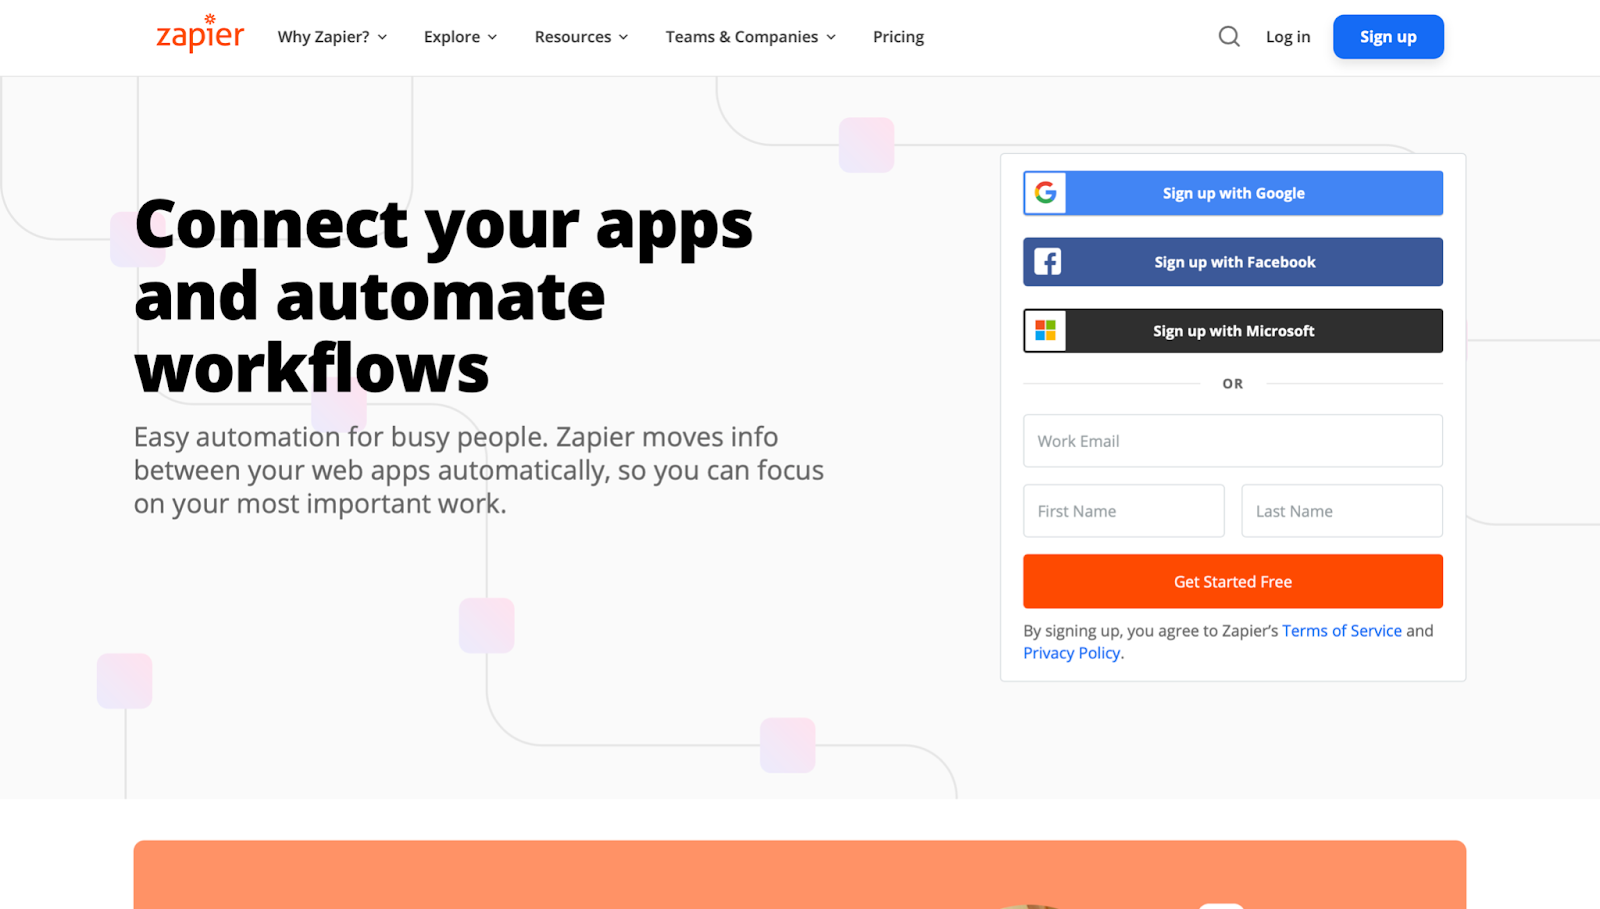
After you add the Zapier bot into your workspace, go to the Zapier website and create a Zap. Here’s a quick explanation of what a Zap is:
“A Zap connects Rock to other services through an automated workflow. They trigger one or more actions when a certain instance occurs. When a Zap is enabled, it will repeat a certain action (for example, create a task) every time an event (trigger) is recorded (such as when someone fills out a Google Form)”
Google Forms integration will be created for the following explanation guide. You can also connect to hundreds of other applications. For more information, we recommend checking out the different Zapier help pages.
Creating a Zap with Rock
To automate workflows in Rock you need to create a Zap manually at first. After that, you can share Zaps or duplicate them if you want to create similar automations across workflows.We will explain how to create a Zap by integrating a Google Forms sheet into a Rock space.
Creating a trigger
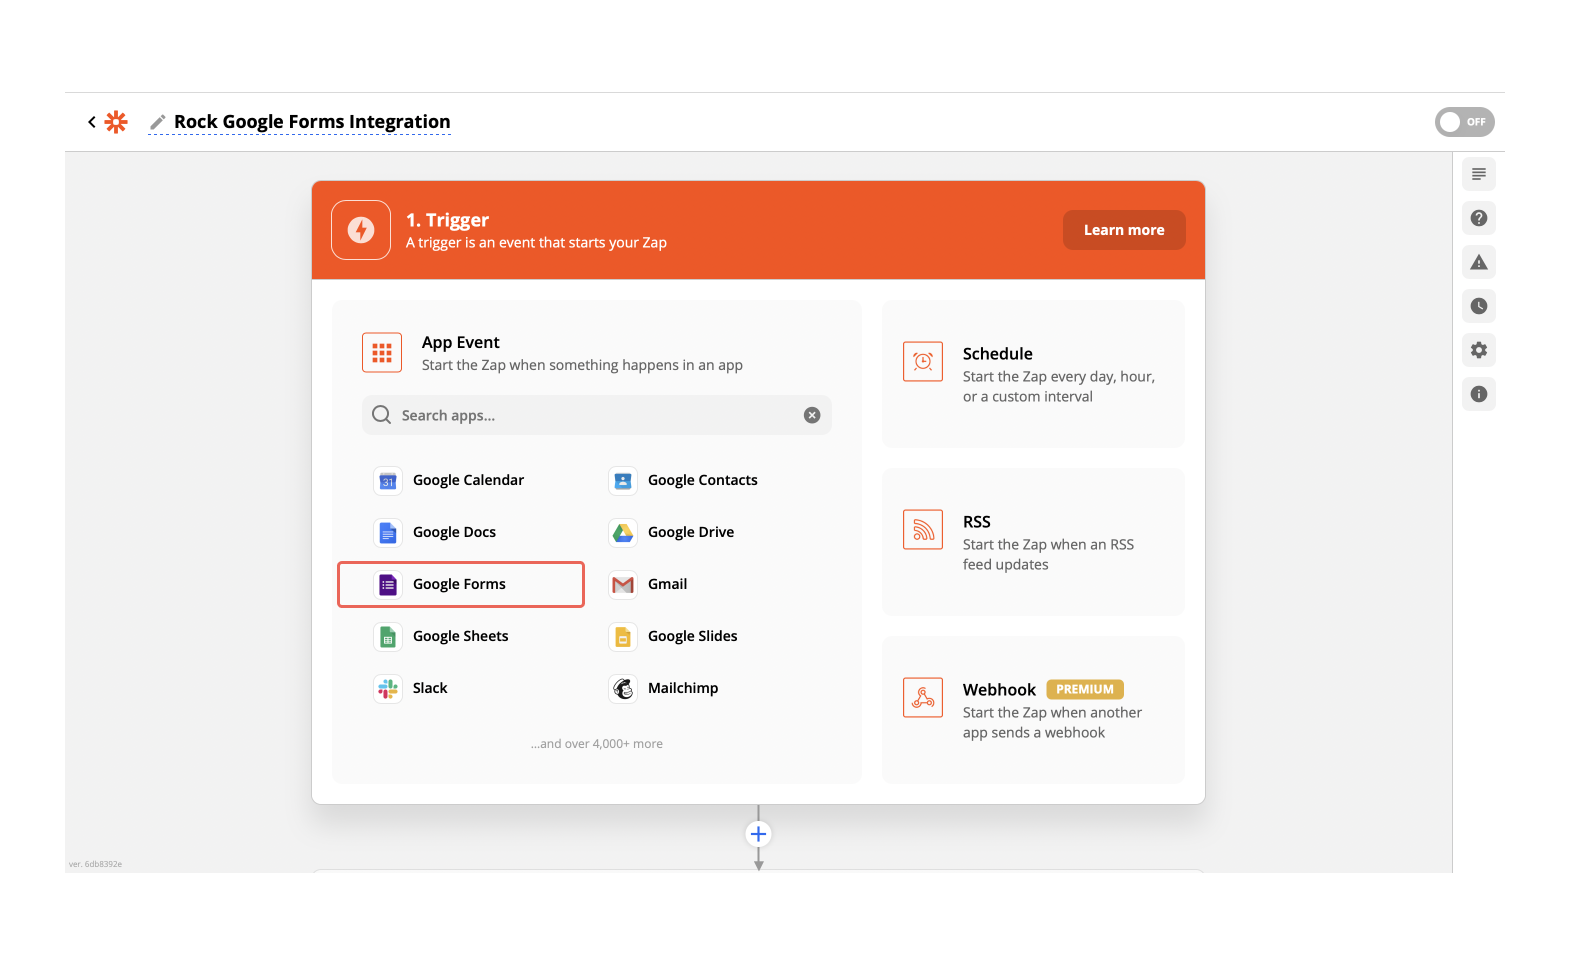
Google Forms has been selected as a trigger in this guide. A trigger is an event that starts a Zap. Once you’ve set up a Zap, Zapier will monitor for that trigger event. If you want to connect other triggers and need help, we recommend checking out the help guides shared in Zapier. Follow the steps below to create a trigger for Google Forms.
1. Go to Zapier and log in or create an account
2. Create a Zap
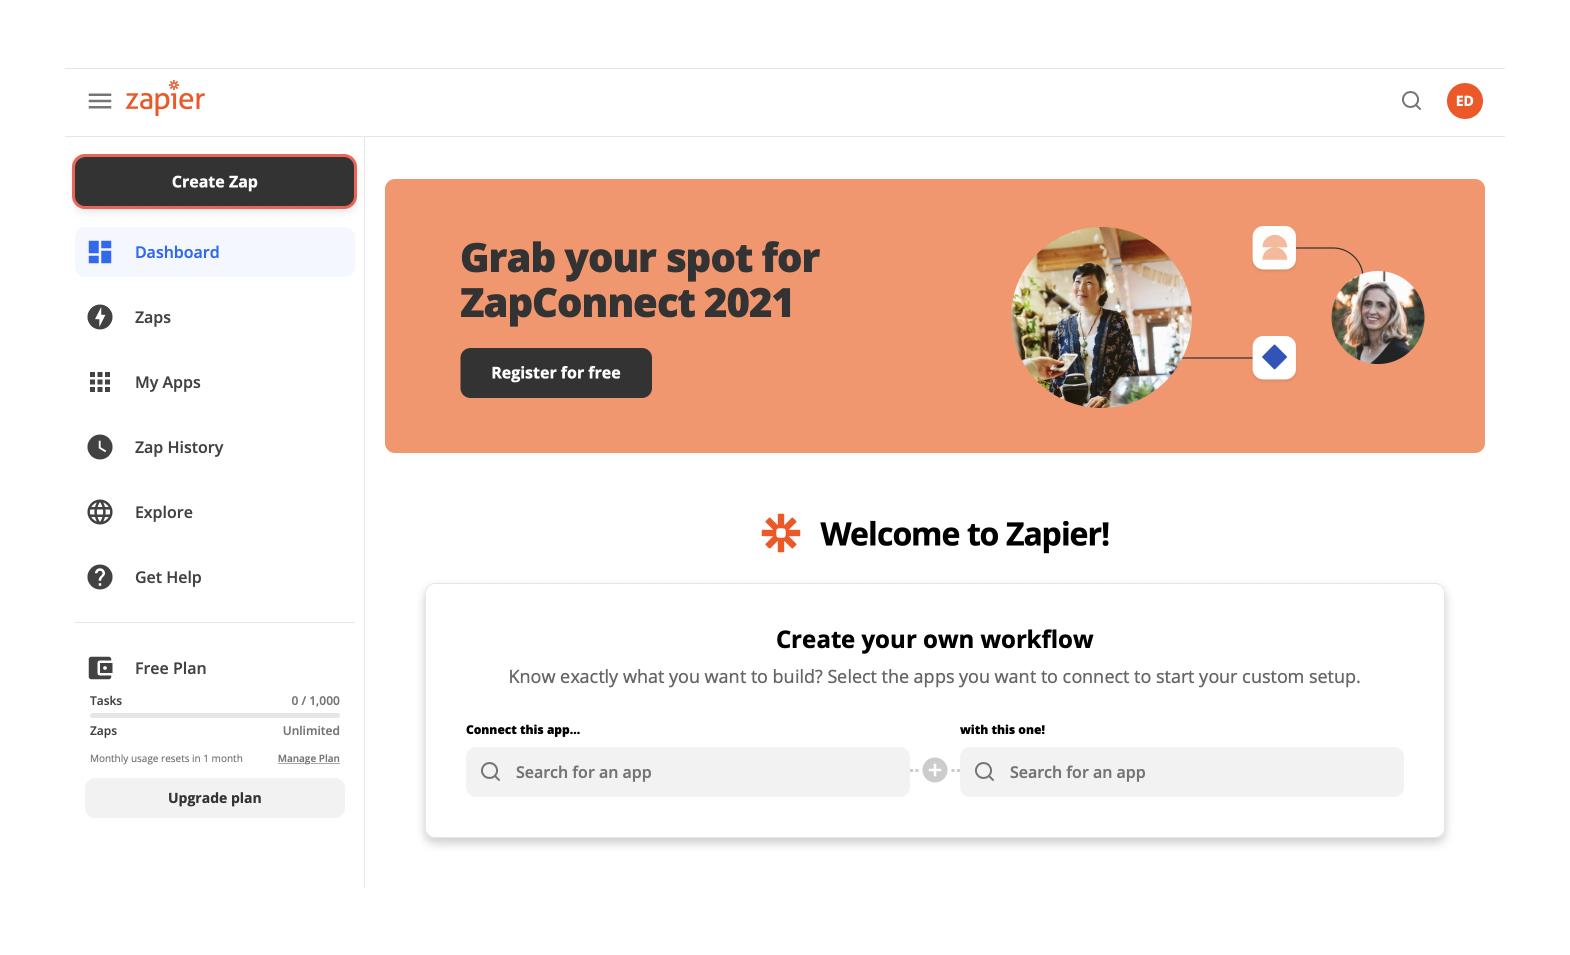
3. Create a triggerBelow are some of the common activities you can do in the trigger panel:
- Name your Zap in the top left corner (for example, “Rock Google Forms Integration”).
- Search for the app that will trigger the Zap.
For this help guide, we selected “Google Forms” since it is the integration we want to create. Check out Zapier’s guide for creating triggers for more information about features not discussed on this page.
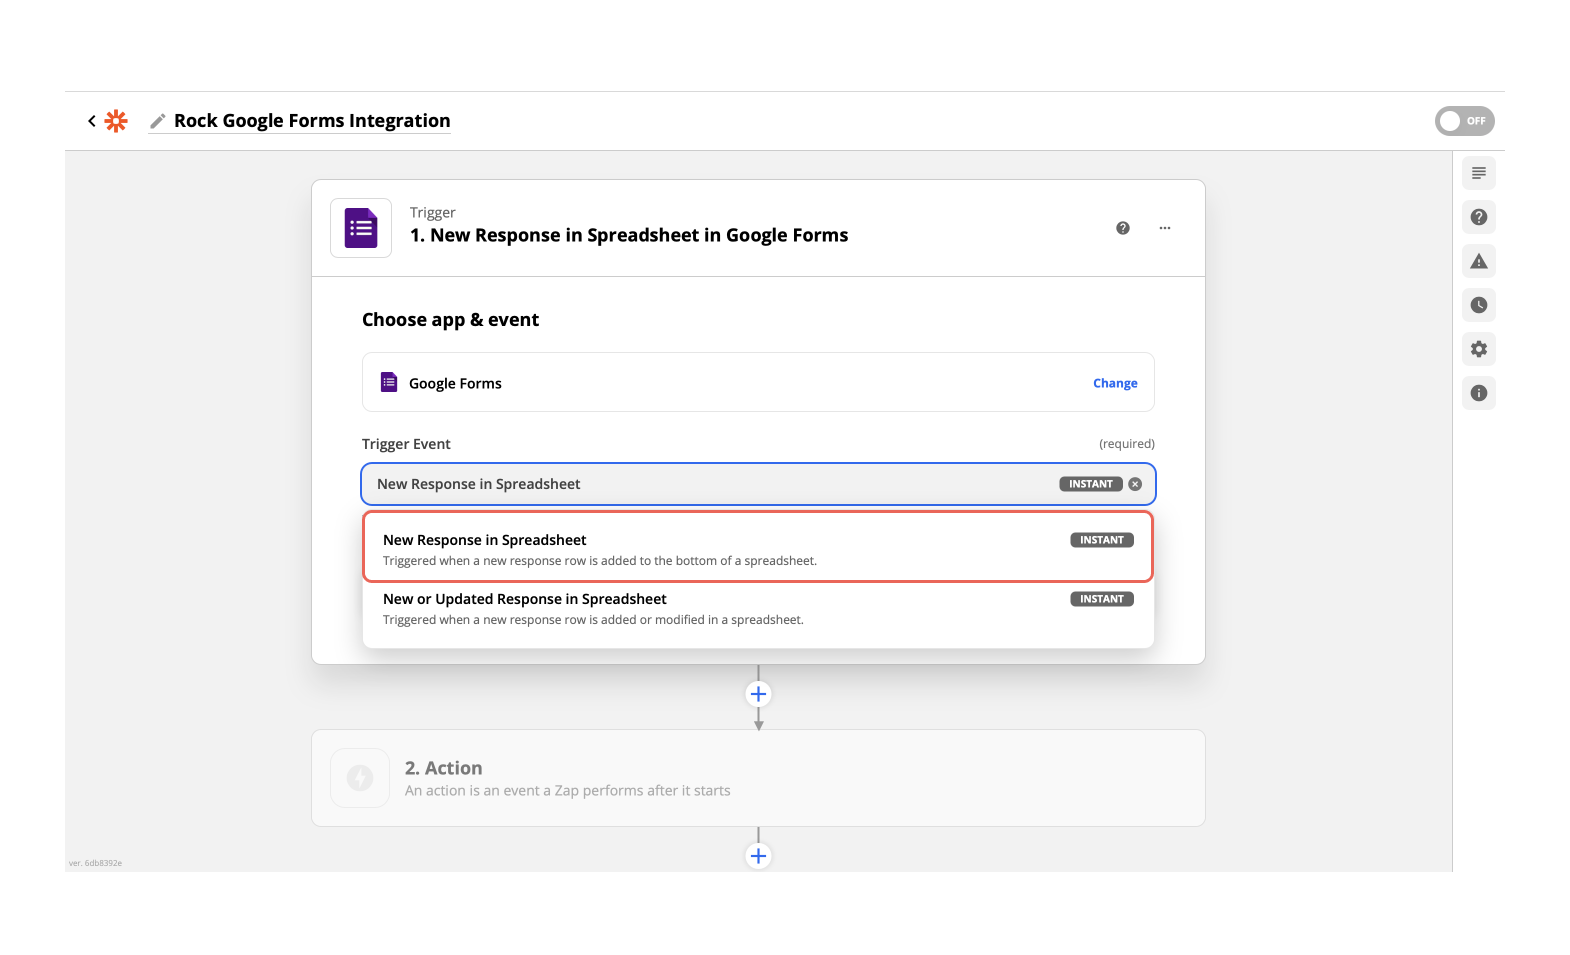
4. Select your event from the trigger event dropdown menuDifferent activities are enabled depending on the application that can be triggered with the Zapier application. For our example in this help guide, Google Forms can be triggered when:
- A new response is recorded in the spreadsheet (selected in this help guide)
- A response is updated or a new response is recorded in the spreadsheet
If there are any activities you would like to trigger with an application that are not displayed in the list, we recommend reaching out to the application. We do not have influence over the available trigger options from third party applications.
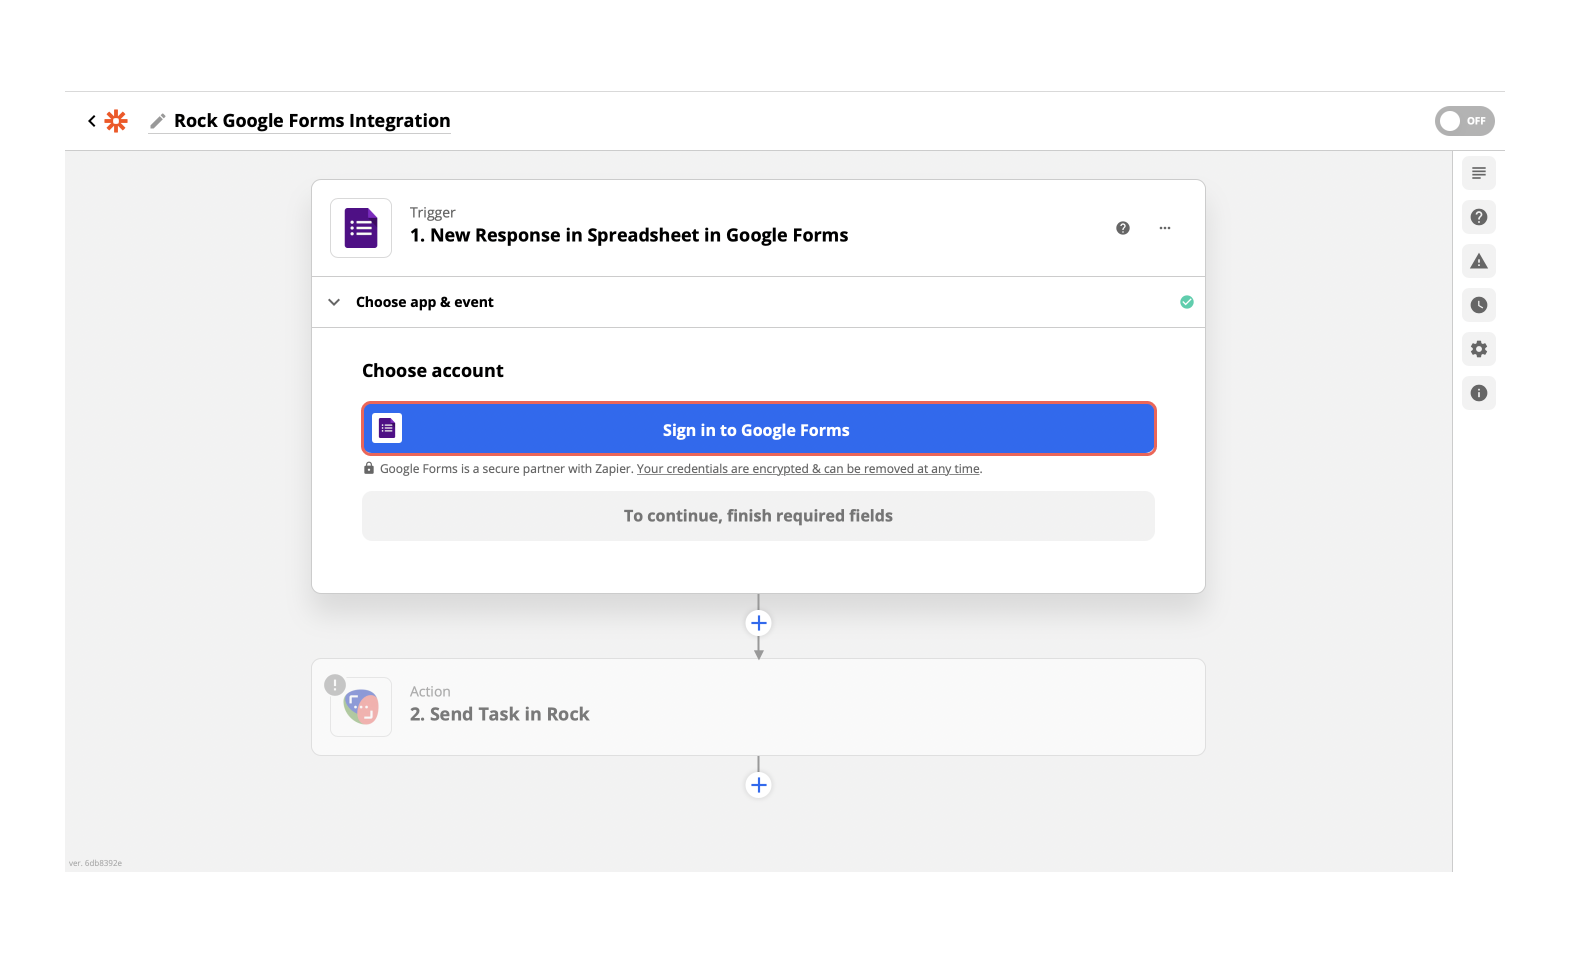
5. Sign in to your Google Forms account
6. Select the Google Form you want to addTo add a Google Form you need to create an additional spreadsheet where the responses are recorded. Otherwise, your spreadsheet will not appear in the spreadsheets dropdown menu. Here’s how you can enable it for your forms:
- Go to “Answers” in your spreadsheet.
- Click the Google Sheets icon in the top right corner to display the answers in a spreadsheet format.
- Name the spreadsheet and save it.
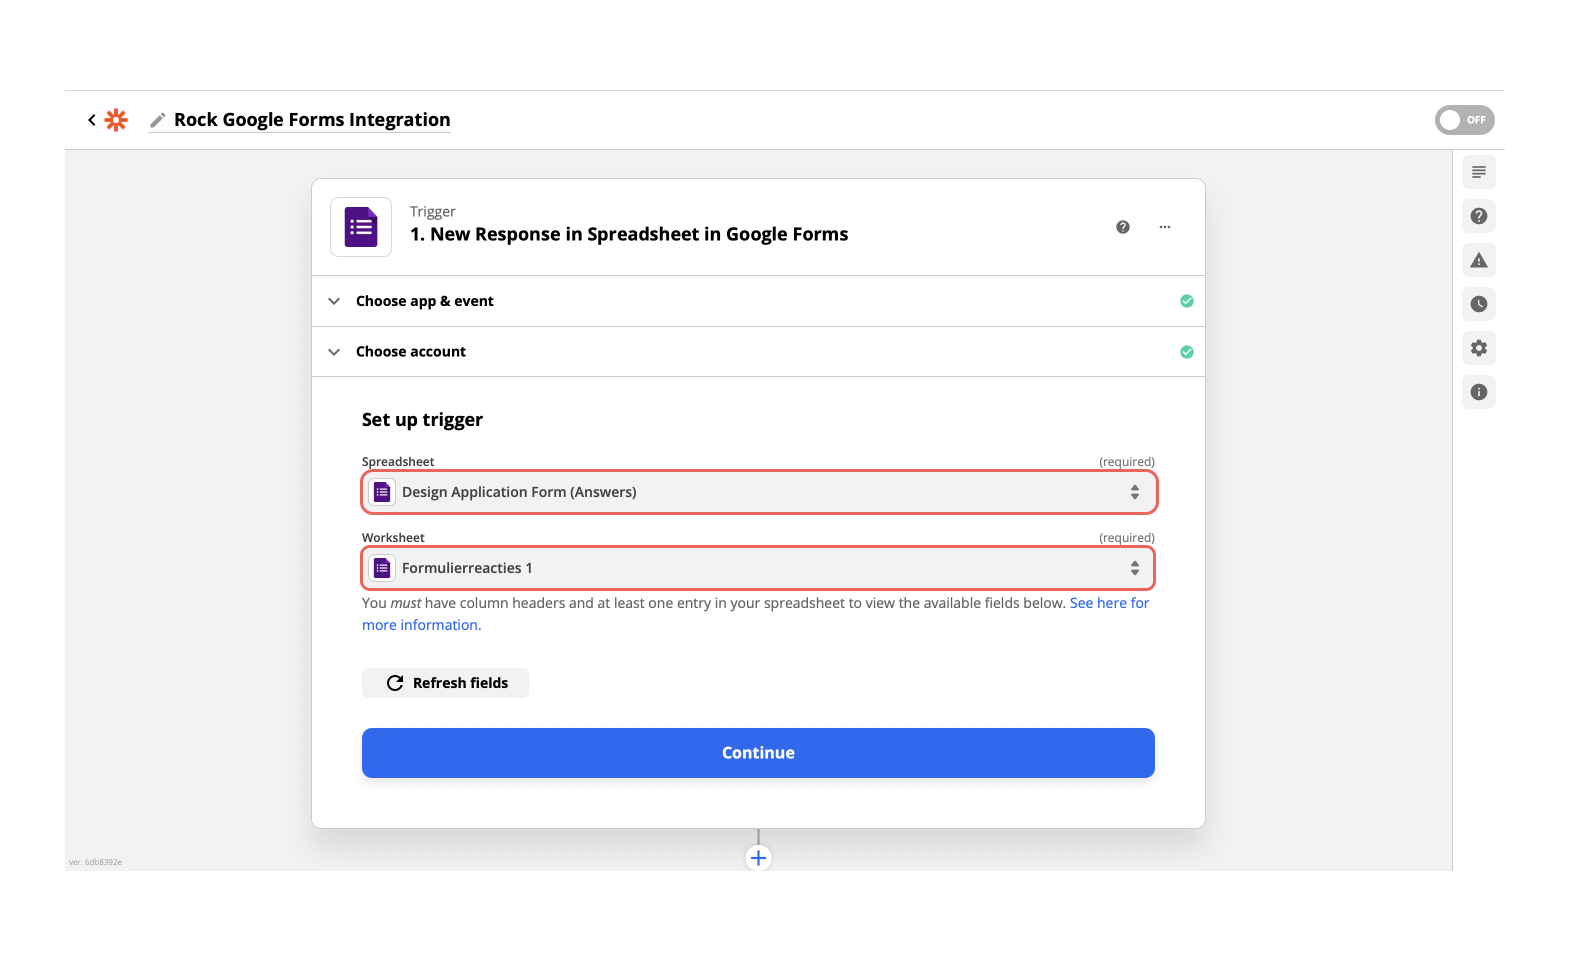
After you enable the spreadsheet, it will appear in the dropdown menus for setting up the trigger. First, select a spreadsheet. Second, choose the worksheet that you want to get the information from.
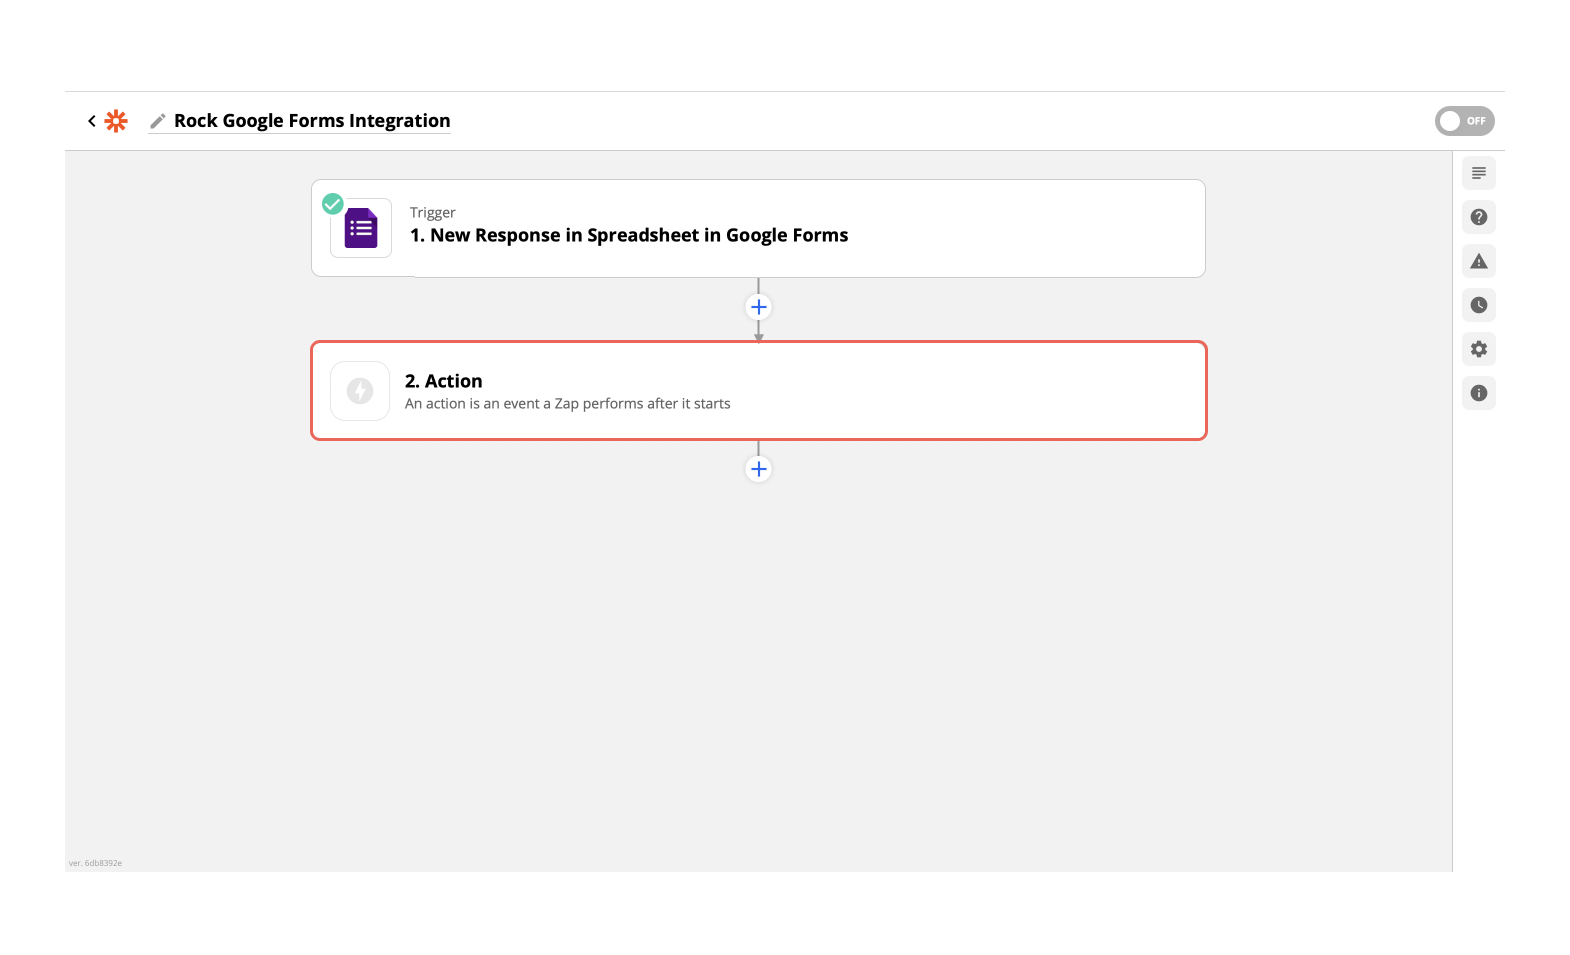
7. Test your triggerTest your trigger to make sure Zapier can retrieve information from the application. After a successful trigger attempt, a green checkmark will be displayed on the icon of the application.

Creating an action in Rock
Once your trigger has been created the next step is to create an action. An action is the automated activity that will be triggered in your Rock spaces.1. Add a new action with the plus sign or select the box
2. Search for Rock and add it
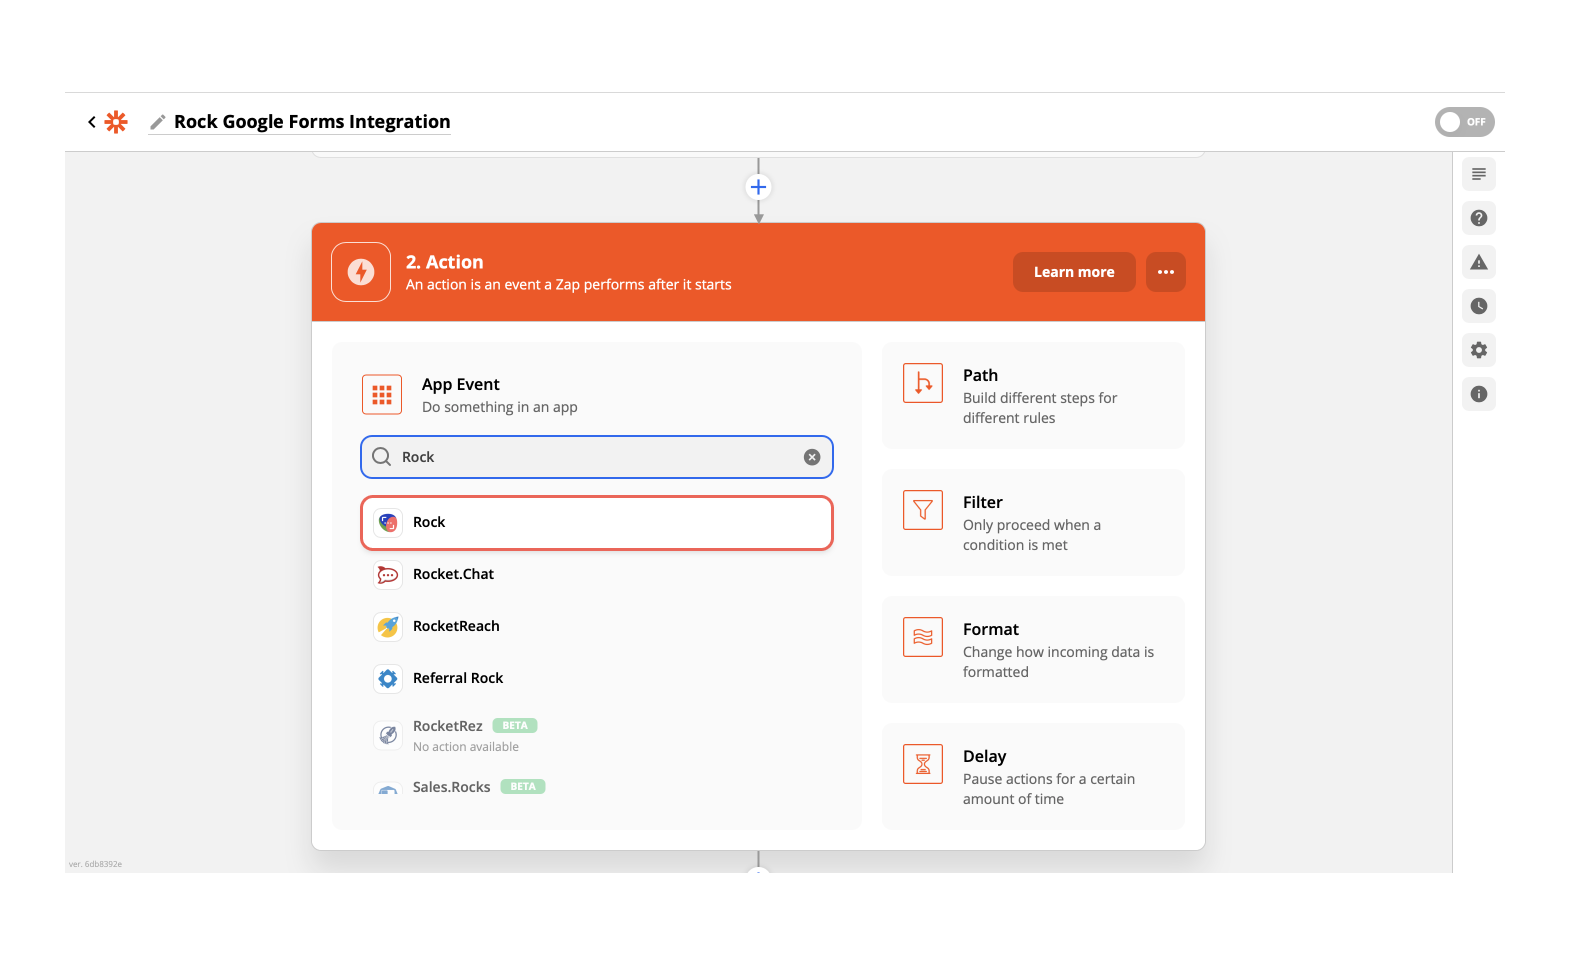
3. Customize the action you want to see in RockThere are three different actions you can trigger in Rock with your Zap:
- Create a task: Automatically create a task when the trigger occurs.
- Create a note: Automatically create a note when the trigger occurs.
- Send a message: Automatically send a message into a space when the trigger occurs.
If you want your Zap to do more than one activity (such as sending both a message and task when an event happens) you can press the (+) sign in the bottom and add a second action.
4. Sign in to your Rock account

5. Enter the Zapier bot token from the space in Rock that you want to add the integration to
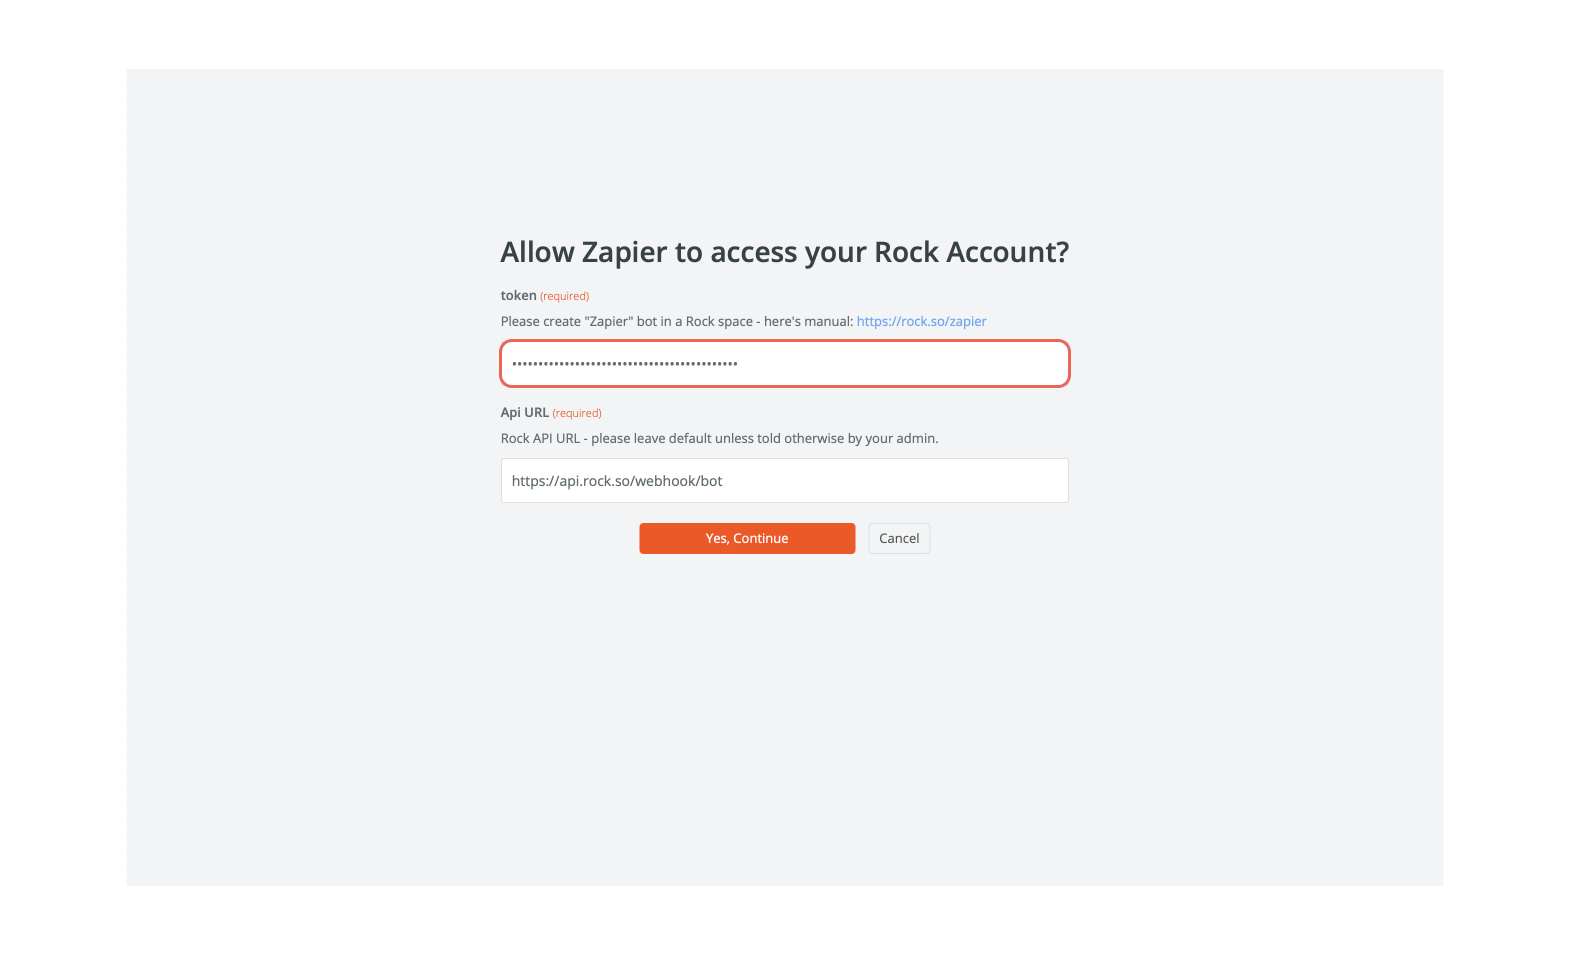
The space you want to have the integration in should be displayed in the action panel now. If the wrong space name is displayed you should check if you have used the correct token.

6. Select how Zapier should fill out your object in Rock (task, note or message)Zapier lets you fill out the fields of tasks, notes and messages. By filling out the fields, you can customize the automation more and make the integration connect to your Rock workflow better.
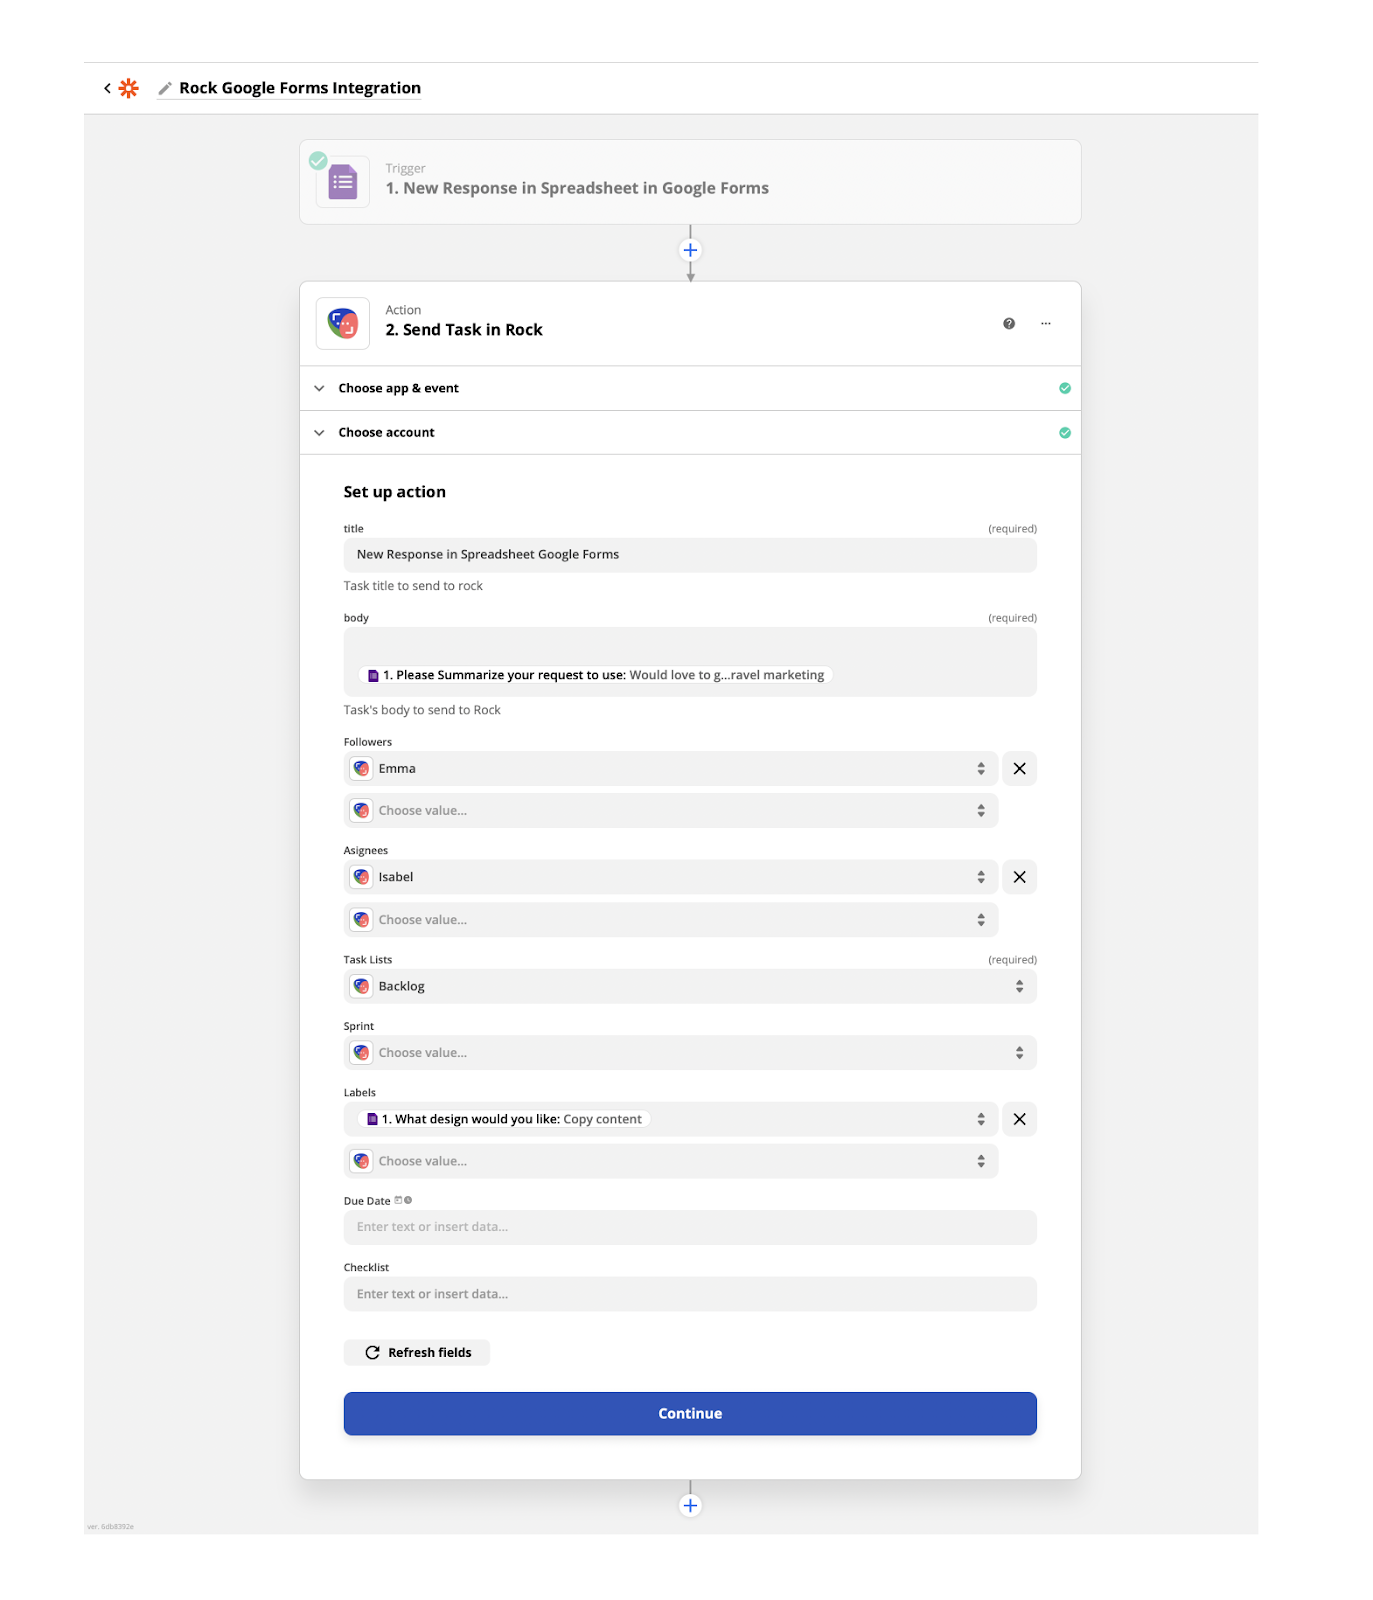
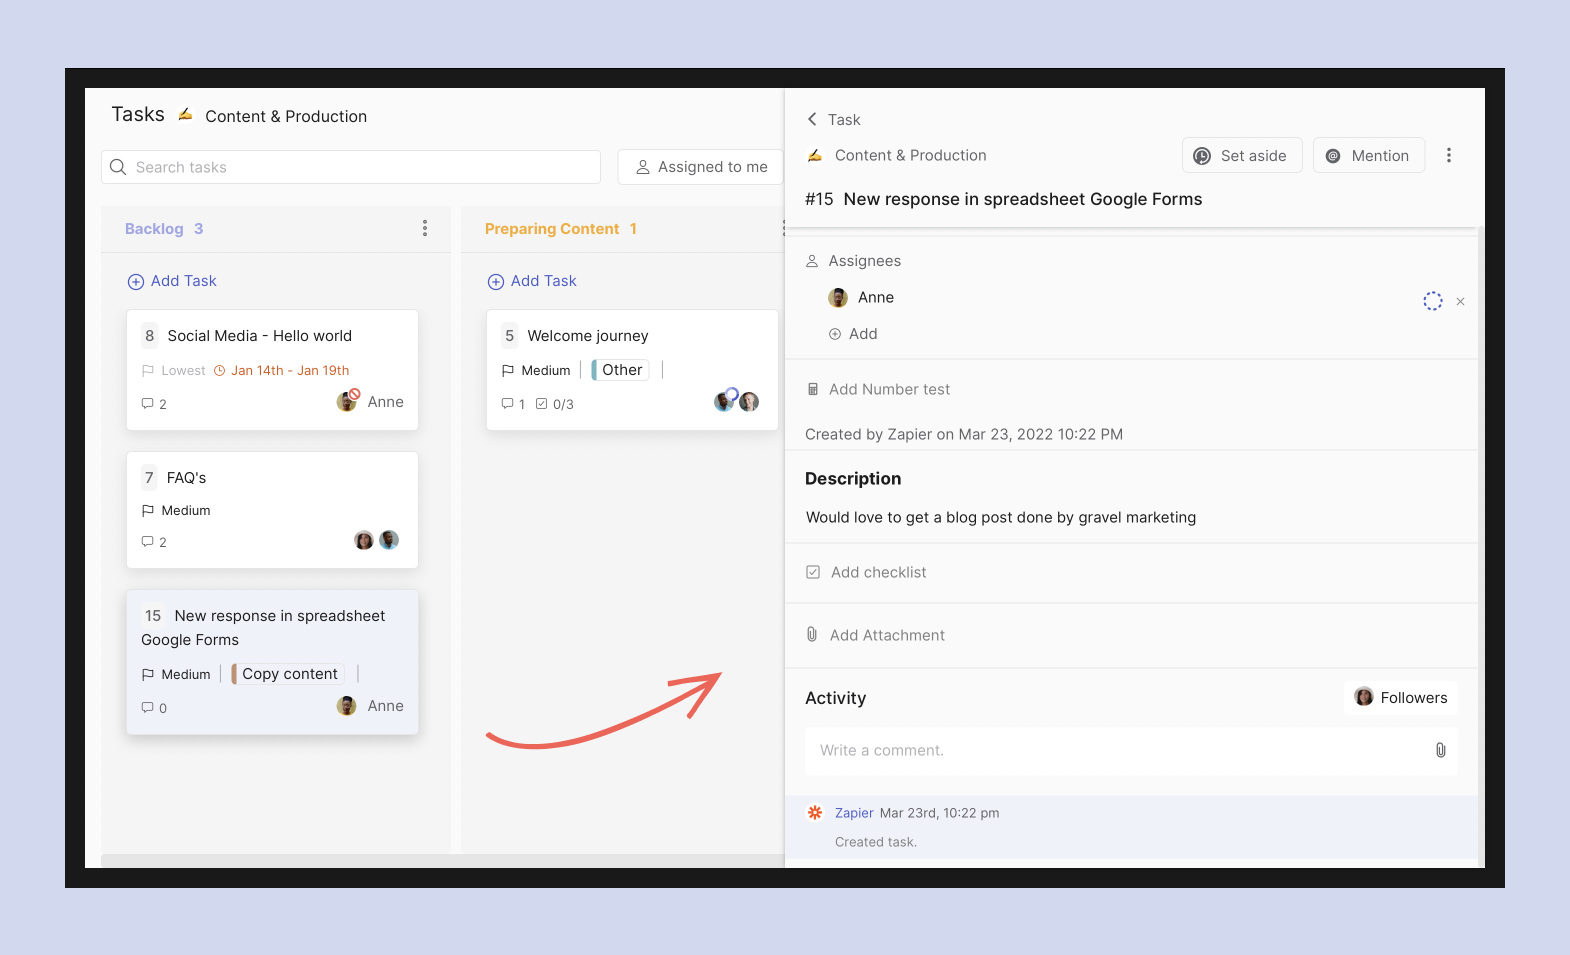
Automating Tasks on Rock
Zapier enables your trigger to fill out the task automatically. You can also opt for manual information entry instead. You can fill out the following fields:
- Task Title: Fill this out manually or with a field from your trigger or a combination of both.
- Body: Fill this field with manual information or field(s) from your trigger.
- Followers: Fill this with guests, members, admins in the connected space.
- Assignees: Fill this with guests, members, admins in the connected space.
- Task list: Choose the list Zapier should put the tasks in.
- Sprint: If the integration is part of a Sprint or renewed every Sprint, you can add it to a Sprint.
- Labels: Choose from existing space labels or convert a field in the trigger into a new label.
- Due date: Choose if the trigger activities have to be done by a specific deadline. The due date does not have to be a specific date and may also be something like “next Friday at noon”. Check out the Zapier guide to different field types for more information
- Checklist: Add a customized checklist if there is a set of activities that need to be completed for every trigger.
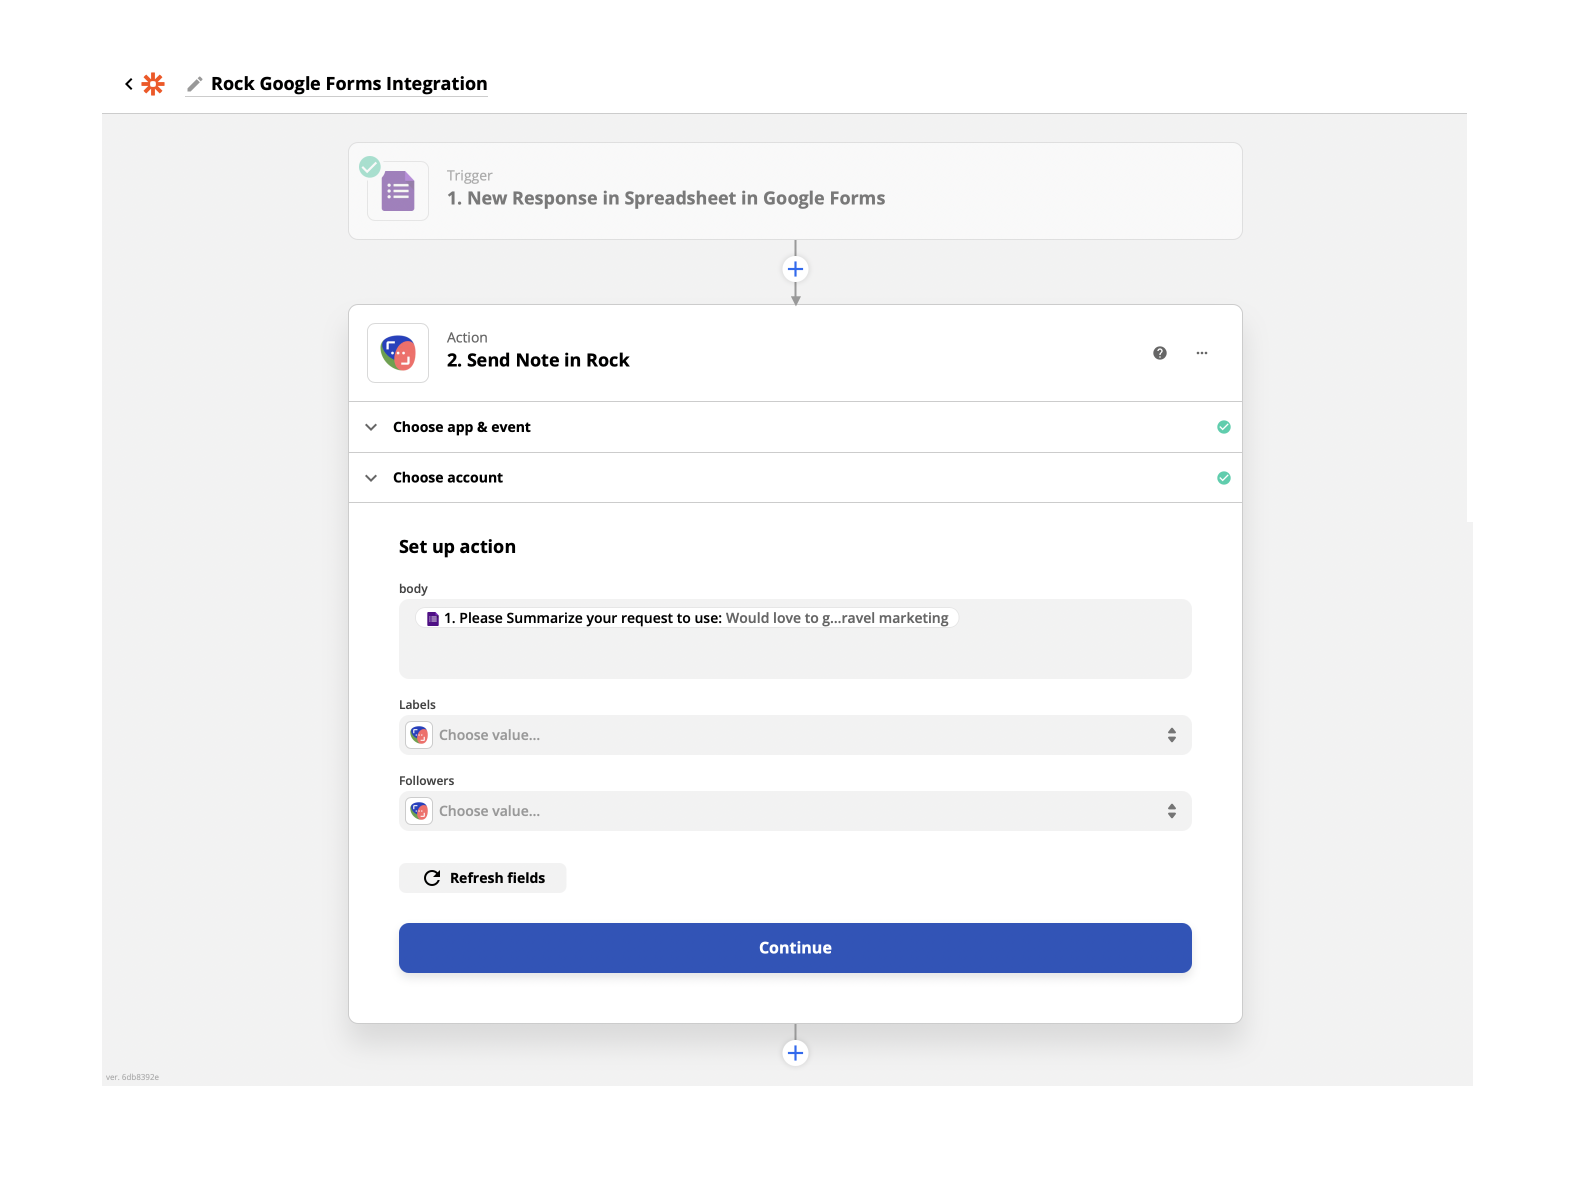
Automating Notes on Rock
Zapier enables your trigger to fill out a note automatically. You can also opt for manual information entry instead. You can fill out the following fields:
- Body: Add manual text and fields from your trigger to the body of the note.
- Labels: Use existing labels or fields from your trigger as a label.
- Followers: Choose from the guests, members, or admins in the connected space
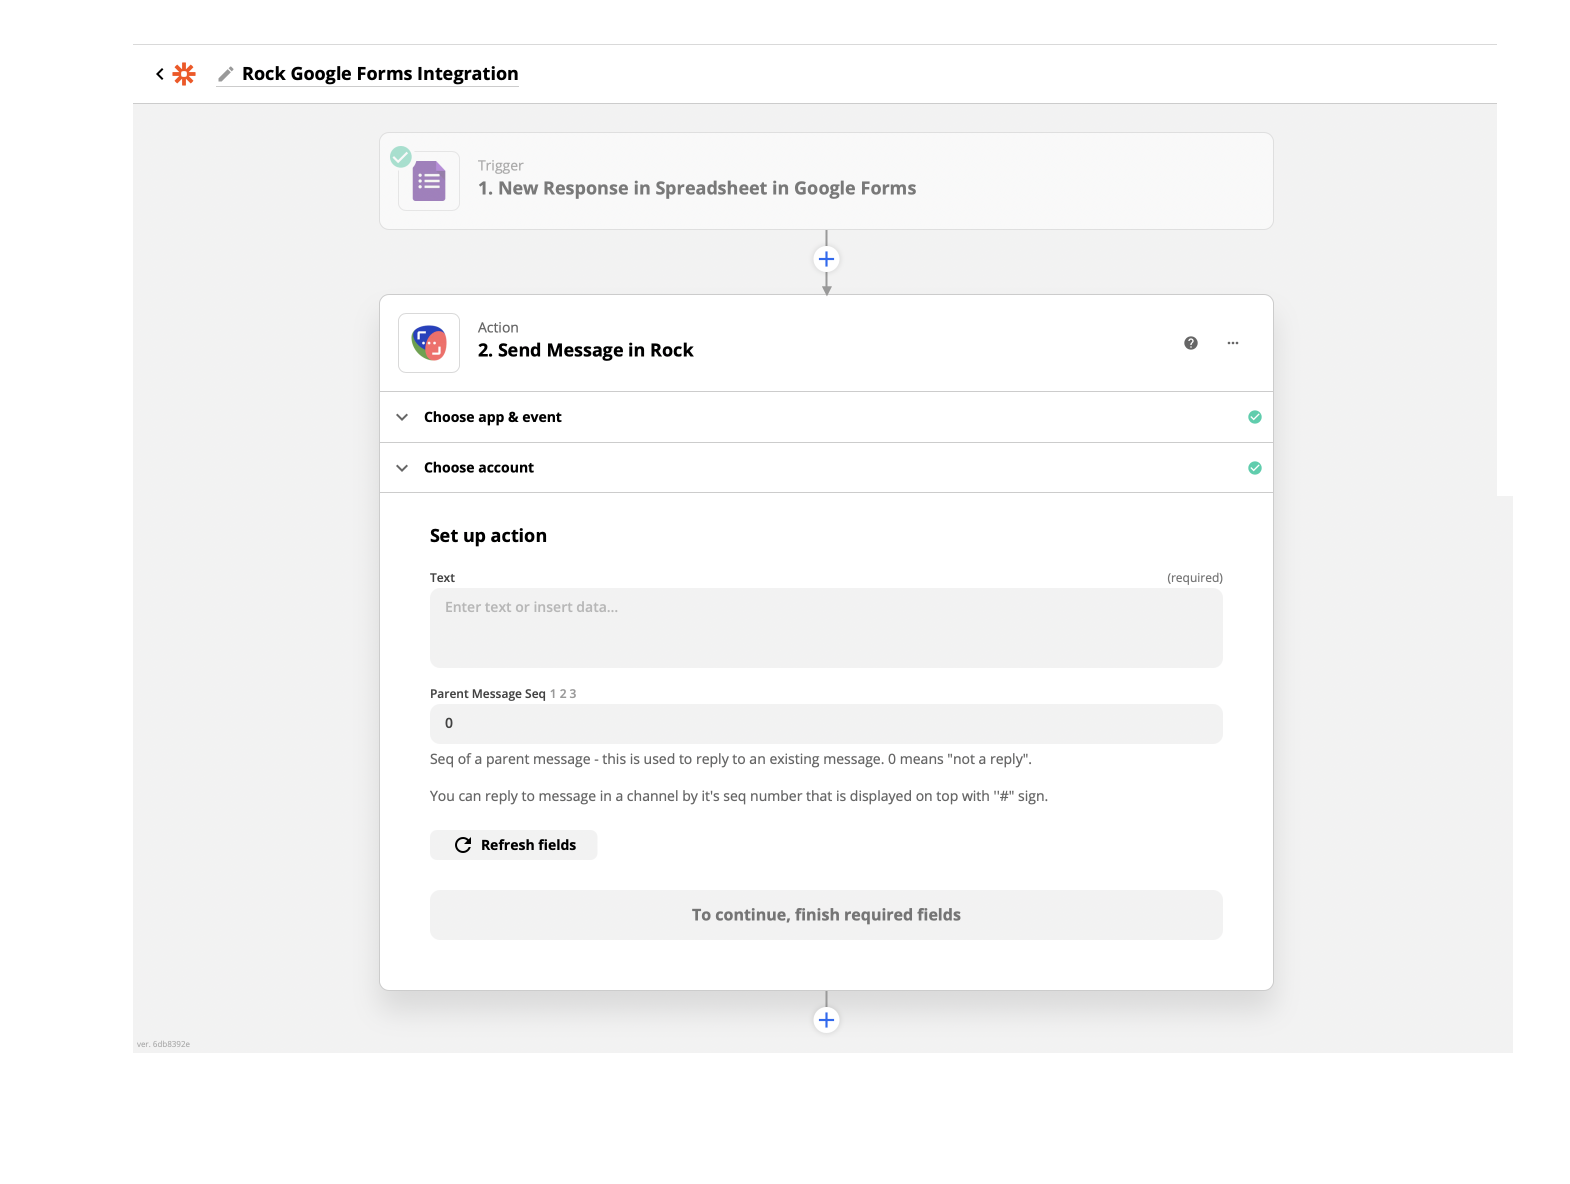
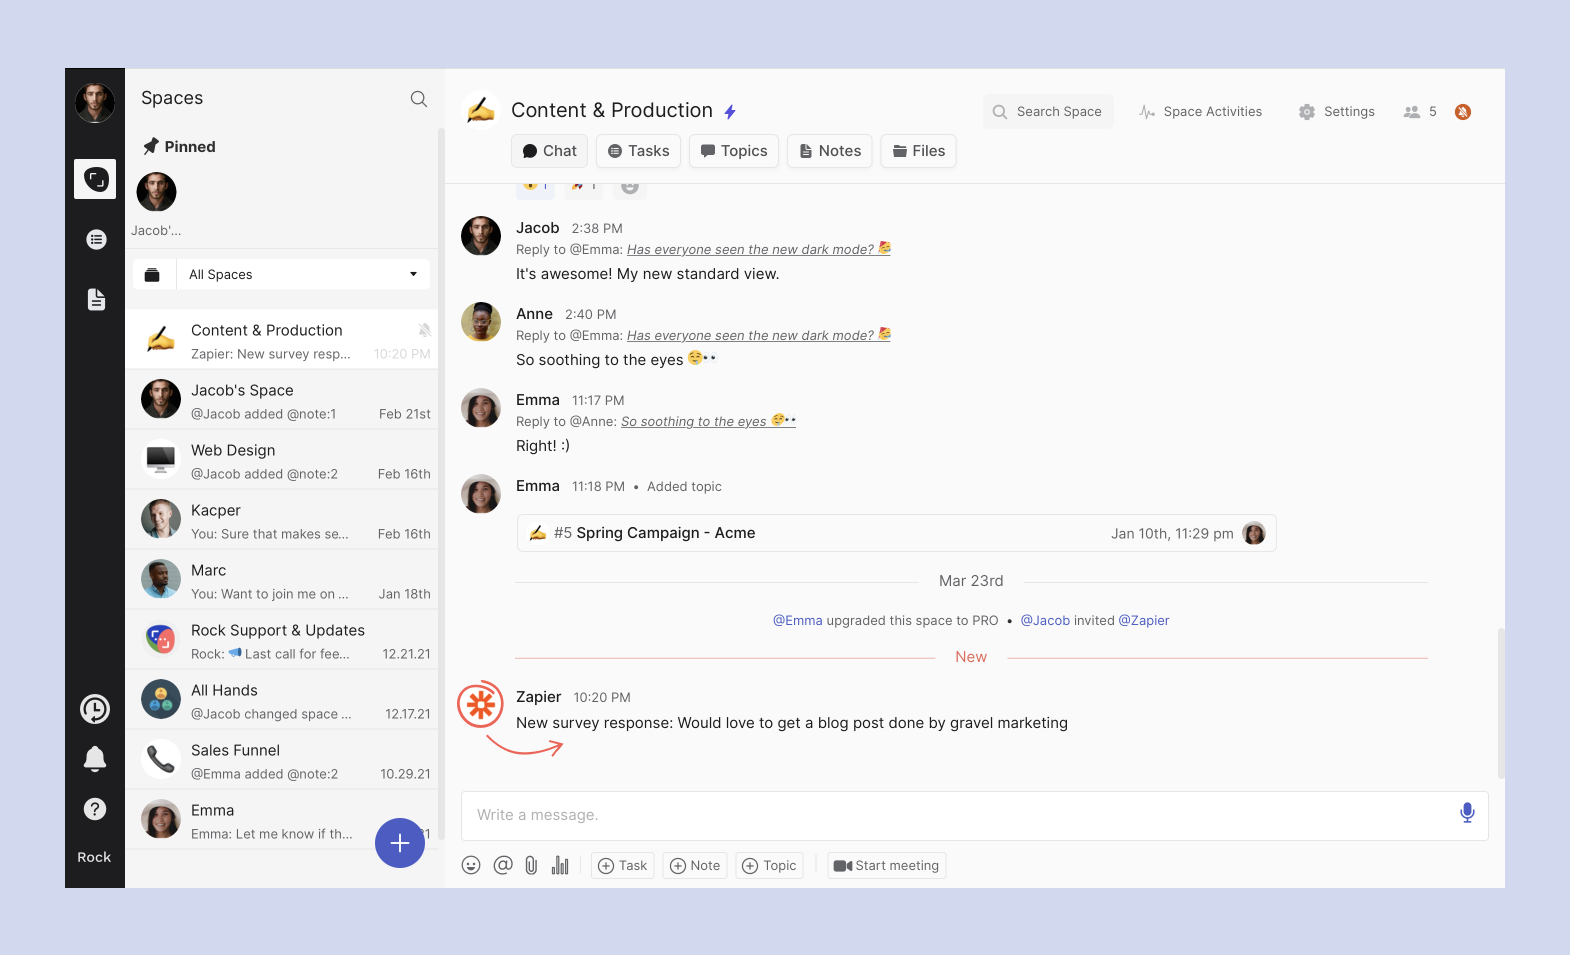
Automating Messages on Rock
Zapier enables your trigger to automatically send a message into a space. You can also add manual information, if needed. You can fill out the following fields:
- Text: Enter custom text or fields from your trigger
- Parent message sequence: Choose whether the message is a reply to an existing message in the chat (use the message # that can be found by hovering over the message) or insert 0 for a message that is not part of a reply.
Testing & activating your Zap
Once your trigger has been activated and your action(s) have been filled in appropriately, you can test the Zap to make sure it is working correctly. Make sure the trigger you are testing has some test fields (for example, test completion of your Google Forms) so Zapier can send a test document to your Rock space.
Testing a taskWhen you are testing a task, it will display in the space you want to see the automation in. If you still want to change any fields you can still edit the fields in Zapier. You’ll be able to make changes to the task in Zapier after automating it.
Testing a noteWhen you are testing a note, it will display in the space you want to see the automation in. If you still want to change any fields you can still edit the fields in Zapier. You’ll be able to make changes to the note in Zapier after automating it.

Testing a messageWhen testing a message it will display in the space you want to see the automation in. If you still want to change any fields you can still edit the fields in Zapier. You’ll be able to make changes to the message in Zapier after automating it.
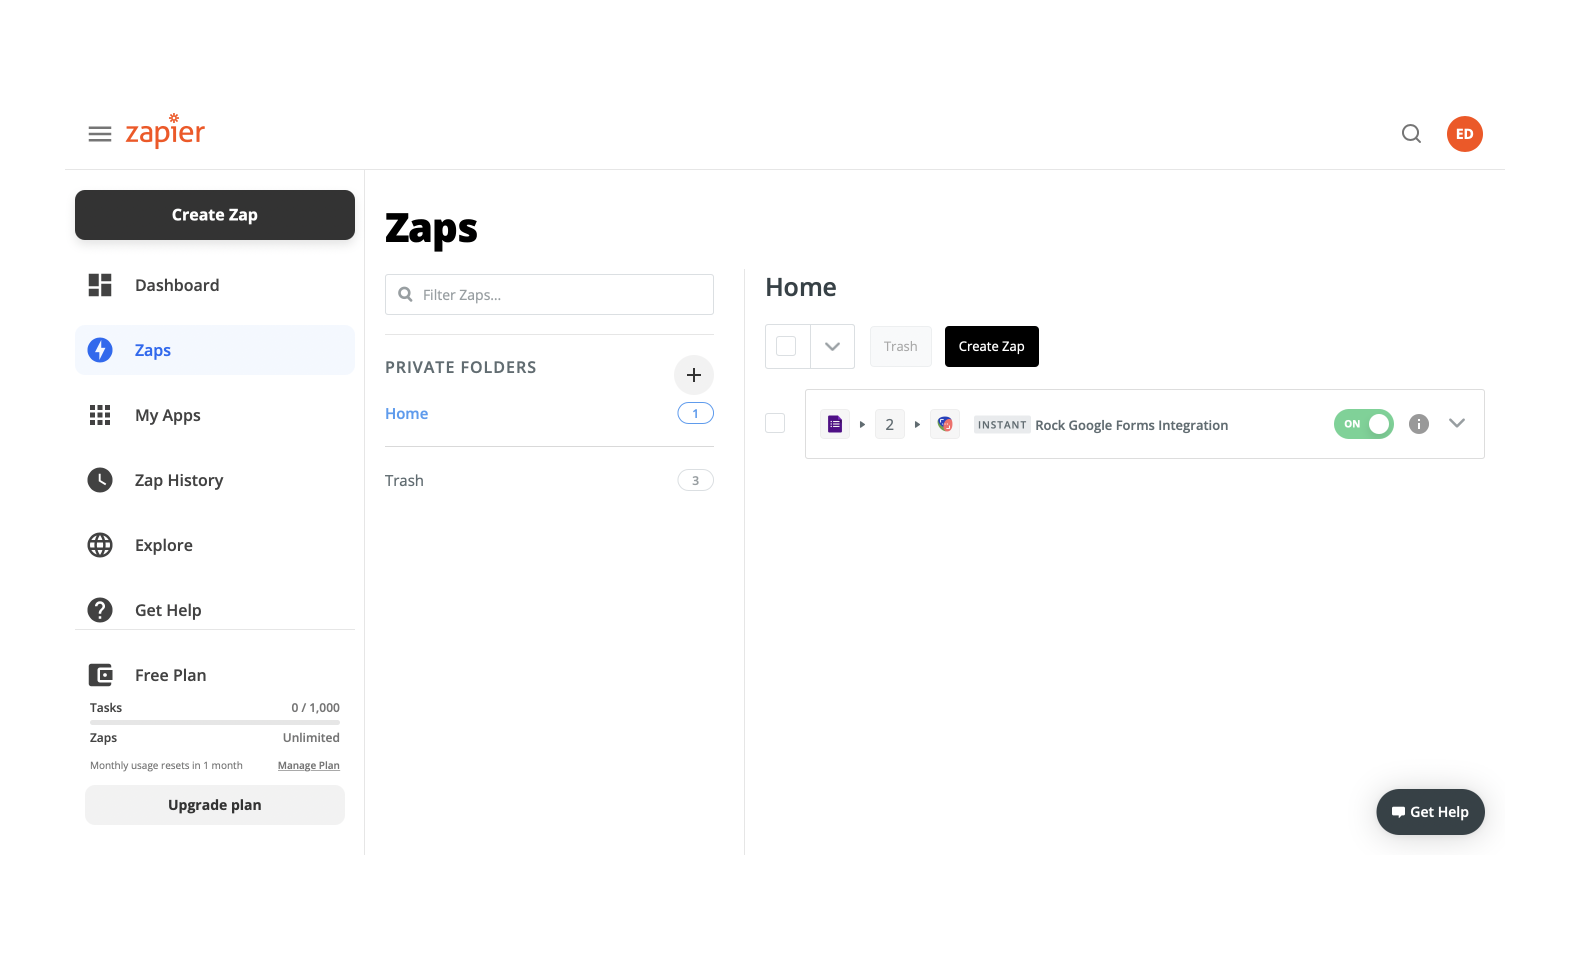
Activate Your ZapOnce Zapier has successfully tested the actions and you are happy with the objects created in Rock, activate your Zap by simply clicking turn on Zap.

Managing your Zap
You can always turn your Zap off or edit the trigger or action in your Zapier profile settings. You can also remove the Zapier bot in your space settings if the automation is not needed anymore.
If you have any questions about integrating Zapier into one of your Rock spaces, reach out for help in the Rock Customer Support space on Rock.
Frequently Asked Questions
Still left with questions? Check out these frequent questions for further support on the Zapier integration on Rock.
Is the Zapier bot free on Rock?
No, Zapier bots can only be added to PRO spaces which are available under the Unlimited plan. Anyone that is an admin in a PRO space can add Zapier bots.
How many Zapier bots can I add to a space?
You can add up to 20 bots to a space. After that it is not possible to add more Zapier bots to that particular PRO space. This does not affect the limit on your other PRO spaces.Note that the same bot can be used for multiple Zaps as well by choosing the same bot in the dropdown menu for the integration.
Can I add a Zapier bot to any Rock space?
No, it is currently only possible to add a Zapier bot to group spaces. It is currently not possible to add a Zapier bot to your personal space, 1:1 spaces or the Rock Customer Support space.
I don’t see the integration panel in space settings, why is that?
Zapier bots are only accessible to space admins. If you are not an admin you will not see the option to add a bot. Request one of the current admins to upgrade your permissions if you need to access the automation.
Information from Zapier is delayed, what could have caused this?
You can configure the time interval of your Zaps on Zapier. For more information please check out this dedicated resource.
How do I remove a Zapier bot from my Rock space?
Here's how you remove a Zapier bot from your Rock space:
- Go to space settings
- Select Zapier from integrations
- Choose which bot you want to remove
- Press ‘Delete’
Note that once a bot has been deleted you cannot recover it. Alternatively you could create a new bot that is configured in the same way as the deleted one.
Where do I find the Rock token for Zapier after the bot has already been created?
Tokens are not retrievable after creation. Make sure to store it on your device or somewhere where you can find it back if you want to access the token at a later point.


